Removed the front of the washer, then lifted the top up and held it up with a prop. Pulled the agitator straight up and started the disasembly. Using the photos in the hub and seal kit was a big help. The large nut on the output shaft had to be cut off with my dremel tool and the hub removed with a wheeler puller. Assembly was pretty
... Read moremuch straight forward. Primed the pump and started the machine for the stated time and was a sucess.
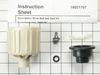
This is not a bad repair, but give yourself some time. I did not have to take the tranny and motor out, but the inner and outer tub and all related parts had to come out, along with the outer tub base. If you are replacing the tub bearing, you HAVE to order the seal kit. Don't try to skimp like I did, since you will need the seal kit as t
... Read morehis is what causes that bearing to fail in the first place. We forgot how quiet the washer was after I fixed it, and it saved us from buying a new washer since we were ready to say the heck with it and buy a new pair. You might need an 1.5 inch socket to get the big nut off the spindle, but I was able to get with a visegrip and hammer. The nice thing about this repair is even if you screw it up, you won't have water all over the place because of the seal design. I just checked under the washer a few times for the first few weeks and all seems fine.
Took off the agitator, removed inner tub, exposing the hub drive. Found fusion between hub drive and agitator shaft. Rather than using a wheel puller as instructions recommended I got my masonry hammer and removed the drive hub in pieces. Removed debris from the tub. Installed sealant around lower seal as instructed. Re-assembled inne
... Read morer tub, agitator with new upper seal. Plugged in the washer, turned on the water. No leak. Happy happy.